Kamis, 23 Juni 2011

how to coloring in anime style with Photoshop *part 1

1) Open your file and the one from which you are copying the style, keeping one close to another. I suggest you to rename your work in a new file named, for example, “FanartColour1” or as you like using File->Save as. Remember to save often. If you make something irreversible (or which you think it is), use Save As and make a whole new file, then you can revert back to the previous save if something really has gone bad. At the end maybe you’ll have “FanartColour1”, “FanartColour2”, “FanartColour3”, etc… XD the important thing is to never lose the work!

colour drawings in anime style with Photoshop
2) I always start colouring the skin (my order is: skin, hair, eyes, cloths, accessories, shadows, lights/reflections). If you color freely you can choose the colours from the colour palette, but in this case we are colouring using the Gotoh style, so we pick the colors directly from the figure using the eyedropper (fig. above). Select the right shade of pink clicking on part of Ruri’s face.
colour drawings in anime style with Photoshop


colour drawings in anime style with Photoshop
Create a new level and rename it “base skin” or what you’d like most, and set it on “multiply”.
colour drawings in anime style with Photoshop
Now, there are two methods of colouring. I like to colour as I was colouring with pastels, free hand, following the borders but without a graphic tablet it can be boring and difficult, so I suggest you a second method, a mouse friendly method. 8D
METHOD 1: Select the brush and follow the borders XD
colour drawings in anime style with Photoshop
Take note of the importance to set the level on “multiply” rather than “normal” with these two images:
colour drawings in anime style with Photoshop
You can also follow the borders accurately (I do it almost always if I’m not in a hurry XD) or “go beyond” and then correct yourself with the eraser, or just “cover” the errors with the layer above (Obviously, setting the two levels on “normal”)
So you can:
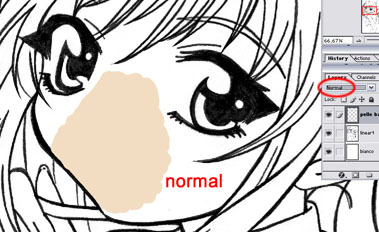
- Colour accurately (Note well: I darkened the pink to make it more visible):
colour drawings in anime style with Photoshop
- Colour messily and then correct:
colour drawings in anime style with Photoshop
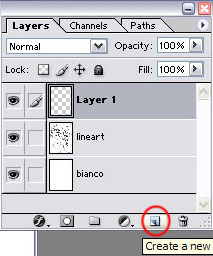
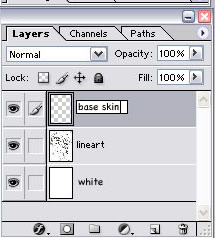
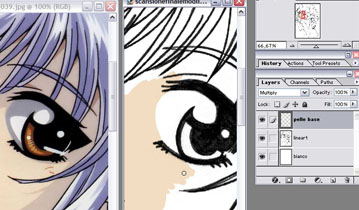
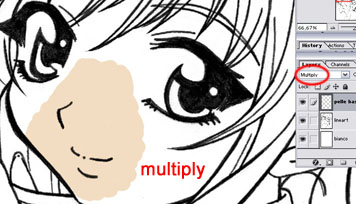
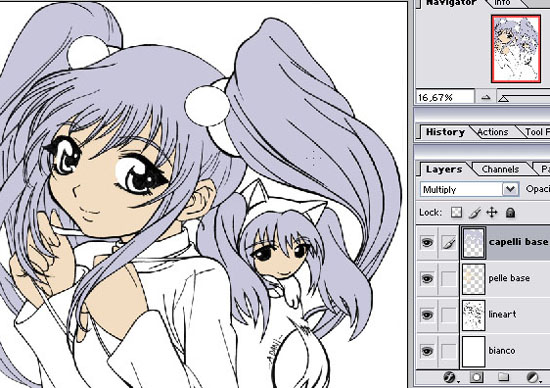
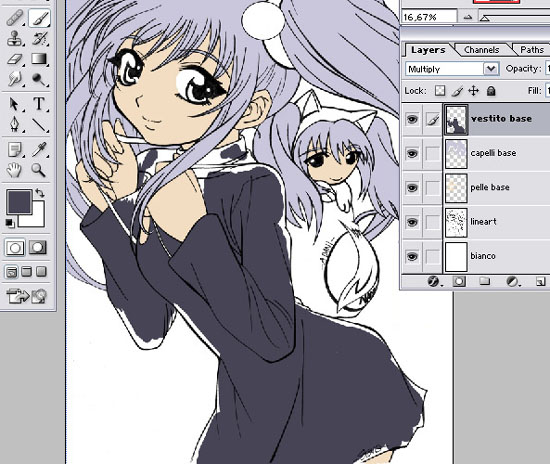
- Colour messily and “cover” with the above layer: download this psd if you want and once opened take a look at the layer window and notice:
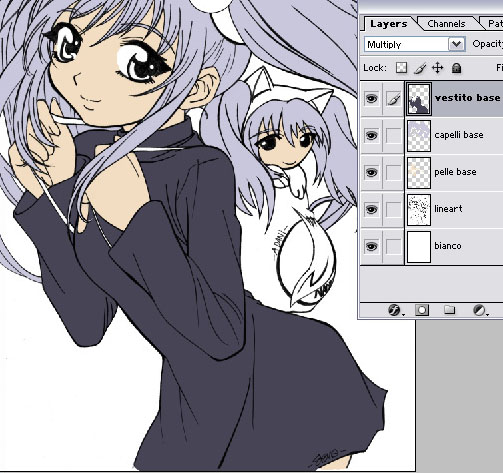
a) the order of the layers
b) the setting of the layers (on “normal”)
c) the fact that the pink of the face “go beyond” the hair and the sleeve
d) now, if you make visible “base hair” and “base cloth” in order (look to the image below), clicking where the circle is… you’ll see the errors with the pink is covered! This because the two levels above the “base skin”, not being set on “multiply”, don’t overlap the colors below! Understood?
colour drawings in anime style with Photoshop
Alternative way for the coloring
METHOD 2
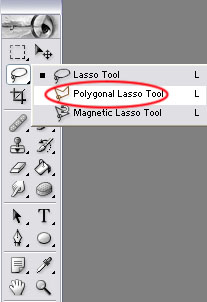
Lasso! Select the “polygonal lasso” tool.
colour drawings in anime style with Photoshop
This is a work of patience, because there are many areas to select, but let’s start to create our selection following the line art. I started clicking where the red circle is, then I moved in counter-clockwise clicking each time where you see the point of the arrow. To put it simple, you must create a selection using an outline with some guide points. The outline closes when a little circle appear under the pointer/lasso.
colour drawings in anime style with Photoshop
(YOU MUST TRY AND LEARN)
colour drawings in anime style with Photoshop
When this is done and ALWAYS keeping pressed the Shift key, redo the previous step and create many others outlines (which will unite thanks to the Shift key) until you obtain:
colour drawings in anime style with Photoshop
We have now selected the areas where we want to make all pink (keep in mind you are in the “basic skin” level set on “multiply). Now using the paint bucket tool with the colour picked with the eyedropper from Ruri image, click INSIDE the selection made with the lasso and you’ll obtain:
colour drawings in anime style with Photoshop
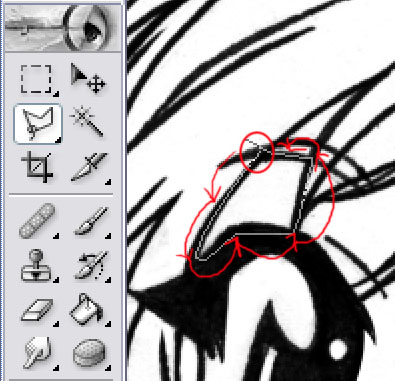
When you are familiar with the lasso (It’s not needed to be too accurate… you can be quite rough and next correct the errors with the eraser or fill the void with the brush), it is easy to colour this way, isn’t it? Anyway, I find it quite “horrid”, and seldom use it . But if someone doesn’t have a graphic tablet this is the most rapid way to colour! AH! KEEP IN MIND THAT FOR EVERY ERROR YOU CAN USE ALT+CTRL+Z! It’s not important what method you use, the important is to obtain (more or less):
colour drawings in anime style with Photoshop
Colour hair and clothes.
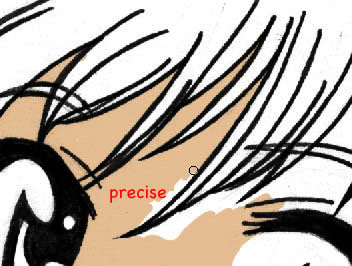
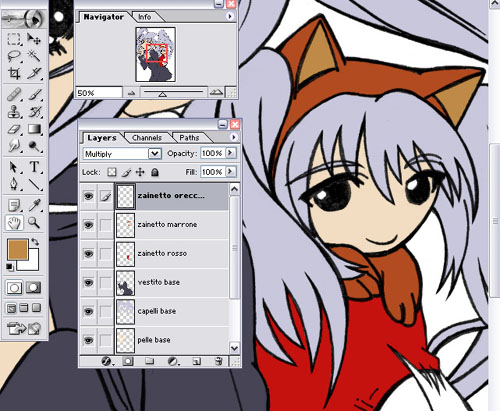
3) Now… repeat what previously done for the hair (use the method you like most). Remember, if you think to go out from the border with the colour even in this case, there is no layer above to cover your error. So be precise!
colour drawings in anime style with Photoshop
Next, the dress
colour drawings in anime style with Photoshop
The Ruri back pack…
colour drawings in anime style with Photoshop
And then the eyes, the hair slide and the spheres… … Et voilà! Base colours done! The result should be similar to this:
colour drawings in anime style with Photoshop

Tidak ada komentar:

Posting Komentar